Category: Tips

Stuck in a Rut? 5 Ways to Get Inspired to Paint

inspiration

There are times in an artist’s life when he feels uninspired, unmotivated, and uncreative. It’s like there’s a creative lull, especially after finishing a major artwork. You feel like you’ll never be able to create another beautiful painting again, you’re tired of picking up your paintbrush and starting your first stroke on the canvas, you have no inspiration to work on. If you are in this phase, here are some ways which can help you get out of the creative block you’re experiencing.

1. Look around you to get inspiration. Get out of your studio and take a walk. Be conscious of your surroundings. Notice the things around you. Look with a fresh new perspective of your environment. Sometimes, because an object, a person, or an event is ordinary to you, you may not take notice of it. You’ll be surprised how simple, ordinary things around you can give you inspiration on your next painting. You’ll be able to express yourself more accurately if your subject is something which you can relate to, or something that you are familiar with.

2. Work on more than one painting at a time. This technique seems absurd. You are uncreative yet I’m suggesting you to work on two paintings. A painting, especially if it’s big-scale, can drain your creative juices in the long run. Working on the same project everyday can be a bit tiresome and tedious. To sort of “spice up” your painting sessions, try doing two paintings. If you’re finished with an area or element in the first painting and you’re feeling tired, you can then switch to the second painting. This allows you to rest your mind from the first painting and when you come back to it, you will see areas which you can improve and enhance.

3. Experiment with a different painting technique or medium. Humans are creatures of habit. We want to do the same things in the same way. If you’re feeling uninspired, try to create a new habit in painting. Learn a new painting style and start using it. This may be a trial and error exercise for you but as you go along, you’ll improve and hopefully, master this new painting style. It can even be your new signature style in your paintings. If you’re always working with oil paints, try using watercolors or pastels. Different media require different treatments, brush strokes, and handling. You may have to learn more about a new medium that you want to work on and studying about it may give you the motivation to start painting again.

4. Look at the artworks of other painters. Art galleries, museums, and art exhibitions showcase numerous paintings and other artworks. Seeing the creativity of other artists can also inspire you to do your own masterpiece. Look at the Internet for paintings done by famous artists and see if you can learn a thing or two about how use the same painting technique or materials in your own project. Check out art magazines to see what subjects are popular nowadays, who are the upcoming artists, or where you can get art lessons.

5. Meet with other artists. Get together with your art friends. If all of you are busy, schedule an appointment that all of you will keep. This is when you can share your ideas, frustrations, tips, problems, etc. Discussing with your art buddies can help you get fresh ideas, be motivated and refreshed. After a lunch or coffee with friends, you may find yourself filled with enthusiasm and eagerness to create another beautiful artwork.

Image source: www.thecreativecomplex.com

Tips for Watercolor Painters: Brush Skills Part One

Practice makes perfect. Every skill that we learn is perfected through constant practice until we perfect them and becomes a second nature to us. Aside from being a talent, painting is a skill that needs to be honed and mastered. Other more experienced watercolor artists have developed different techniques that created their masterpieces that we can also use and here are some of them.

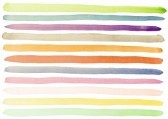
band of colorsBands of Color
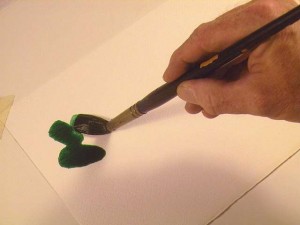
Dip your watercolor brush into a color until loaded and start to paint a continuous wavy pattern across the paper. Keep the width of the strokes equal as much as possible. Add more paint to your brush as needed and continue where you left off until you reach the end of the paper. Rinse your brush and dip it in another color. Make another wavy line right next to the first one but make sure not to let the washes touch. Leave white paper between each stroke. Continue doing this until you fill the whole paper.

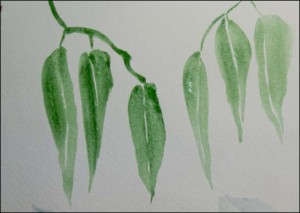
thick and thinThick and Thin
Choose a color or a combination of colors. Dip your brush into the paint and make sure it’s not too wet. Start a fine line using the tip of the brush first then start putting pressure on the brush to make a thicker stroke then lessen the pressure until the line thins out again. Do this without lifting the brush off the paper. Reload your paint brush as needed. Rinse your brush and use other colors to make more lines using the same technique until you fill the paper. You can try to thicken your stroke where the adjacent line is thin, but in particluar, avoid touching the other washes with the new colors you lay down. Being able to instinctively thicken or thin a brush stroke on command while you are painting, and have it go where you want it, is a good preparation for your future masterpieces.

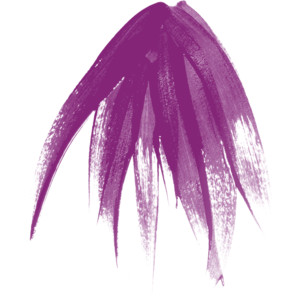
flickWrist Flick
The Wrist Flick is easily done with a decent round red sable or a rigger-style brush. Put paint in you brush and position the tip of the brush pointing towards you. Push the brush tip upward with a flicking motion creating a feathery point at the last part of the stroke. One technique that you can use is you can rest your brush hand on top of my other hand for stability and control of detailed flick strokes. Practice several times in each color you have. Vary the thickness of the strokes as you try to imitate grasses, branches, or even feathers.

There are more of these techniques. Watch out for par two!

5 Tips in Buying an Artist’s Easel

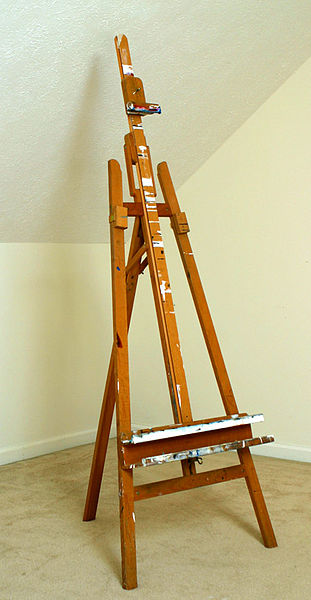
311px-Tripod_easelIn a previous blog post, I explained the different types of easels available to painters. With a wide range of easels out there, how do you choose the easel for you? Here are tips to help you in selecting the perfect easel:

Tip #1. Ask these questions to yourself:

  • What kind of painting do I always do?
  • What medium am I using?
  • What is my budget for an easel?
  • Where will I place and store the easel? Do I have adequate space?
  • Where do I usually do my paintings? Inside a studio or outdoors?

Your answers to these questions will help you decide on which easel is best for you. A tabletop easel is best if you like to paint small-scale paintings or you have very limited space in your room. Different medium require different easels. For example, if you paint with oils, use an A-frame or H-frame easel, or whatever easel that will provide you with a vertical working surface. If you use several medium such as oils and watercolors, a convertible easel is best. Aside from these factors, the budget and space should also be considered.

Tip #2. Check the sturdiness of the easel. The easel should be sturdy enough to hold your canvas, support the painting process, and will not easily topple. The larger the canvas you’re working on, the sturdier the easel should be. You wouldn’t want to work on a shaky surface wherein each brush strokes vibrate because the easel cannot give ample support. Make sure that you’re not buying a display easel which is lightweight and spindly. It is designed for showcasing paintings, and not for working on paintings.

Tip #3. Choose an easel that offers adjustability. Buy an easel which provides the greatest degree of adjustability. When painting, you may want to paint standing up or sitting down, you need to work on top of the canvas as well as at the bottom. You need to have an easel that can be adjusted to give you the right tilt so you can paint on different areas of the canvas.

Tip #4. Look for an easy-to-use easel. This tip is related to Tip #3. Check if you can easily use the screw and bolt mechanism of the easel. See if it tightens properly according to the height and angle you preferred.

Tip #5. Save money for a quality easel. Keep in mind that an easel is one of your biggest expense in painting. You may have to wait for some time and keep saving for a high quality easel rather than buying cheap easels. You will be using an easel for a long time so it’s better to buy an easel that would last.

Watercolor Painting Supplies for Beginners

Watercolor is one of the most versatile mediums to work with that you can paint your subjects from very controlled and detailed, to very loose and impressionistic. It is exciting and enjoyable but challenging and a bit frustrating at the same time. Now that you’ve decided that you want to try watercolor as a medium, you need to start somewhere and that is to know your materials.

watercolor

Paper
Watercolor paper is essentially blotting paper marketed and sold as an art paper, and the two can be used interchangeably, as watercolor paper is more easily obtainable than blotter and can be used as a substitute for blotter. Lower end watercolor papers can resemble heavy paper more while higher end varieties are usually entirely cotton and more porous like blotter. Watercolor paper is traditionally torn and not cut.

Paint
Watercolor paint consists of four principal ingredients: pigments, gum Arabic, additives and solvent. The term watercolor refers to paints that use water soluble, complex carbohydrates as a binder. Originally (16th to 18th centuries), watercolor binders were sugars and/or hide glues, but since the 19th century the preferred binder is natural gum arabic, with glycerin and/or honey as additives to improve plasticity and dissolvability of the binder, and with other chemicals added to improve product shelf life.

Palette
Cake and Pan watercolor sets usually have built-in fold out palettes that are useable in varying degrees depending on their size and orientation. For your tube watercolors you can use a flat white dinner plate or buy some inexpensive 6 or more welled plastic palettes like the ones you used in grade school for your tempera paints. A covered plastic palette makes for the least waste and most convenience if you are using tube watercolors. If you are getting serious, buy one.

Brushes-water-bent-150258Brush
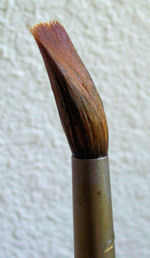
A #8 round red sable watercolor brush is the best beginner brush to buy most especially when you can afford only one brush. Adding a round #4 and a 1″ flat would come in handy for detail work and large washes. Most manufacturers have starter sets that contain very usable equivalents.

Water
Find a glass or jar, or small bucket to hold fresh, clean water. Use two for rinsing your brush between colors, and for clean water for painting. Avoid hard water for it decreases paint solubility and flow. Tap water is usually fine

Extras
Some minor extra things that you will need in you watercolour kit is a pencil, a kneaded eraser, some tissues, and an old towel or paper towels, and a couple of large metal clips for holding your watercolor paper to a board.

Image source: watercolorpainting.com

Tips in Painting on Large Canvases

Spolarium_Luna
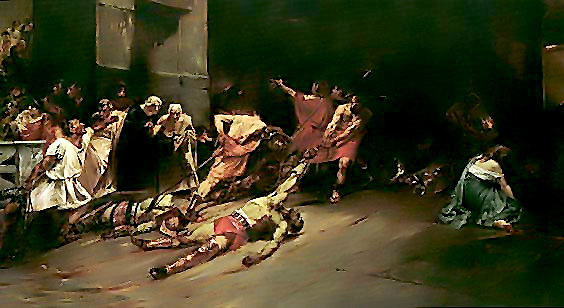
The Spoliarium by Juan Luna, 1884. It measures 4.22 meters x 7.675 meters.

Many artists dream of painting on a bigger canvas. If you have an idea or inspiration that cannot be captured on standard size canvases, going big is your way to go. However, if you’ve never painted on a large canvas, you can be intimidated and overwhelmed with the thought of creating big-scale art. Here are some tips that can help you overcome your fears on painting big.

Tip #1. Gradually paint on bigger canvases. Help your mind, eyes, and hands to adjust painting on a large canvas. Every couple of weeks or so, try to paint on a canvas which is bigger than the previous one you used. This practice will help you get comfortable and get used to painting big. With a small canvas, you’re working on a limited space so the details are smaller, lines are finer, and you finish quicker than painting on large-scale canvases so, you may have to practice your brush strokes little by little until you reach your desired canvas size. Learn from your mistakes and correct them along the way. Don’t be in a rush to work on a large canvas.

Tip #2. Know the scale of the painting. Are you using a big canvas to fill it with small details of a complex subject (e.g. historical event) or are you painting a big-scale of a small subject (e.g. portrait, nature). Find the balance among the subject, the size of the canvas, and your painting style. Remember, just because the painting is bigger, doesn’t mean it’s better than ordinary size painting. Some subjects are perfect for larger canvases while some are best with small canvases.

Tip #3. Use bigger brushes. Bigger brushes will help you finish the painting faster. You can cover larger areas of the canvas and you can loosen up a bit when painting, like a child painting freely on the wall. Stand back from the canvas and see if you’re on the right track.  You can still use small brushes, though, if you’re more comfortable with them and if the style of your painting requires them.

Tip #4. Divide the canvas into sections. Working on a big painting can be overwhelming. Using your sketch as guide, try to divide the canvas into sections and do one section at a time until you finish the whole painting. You can also try breaking down the elements of the painting and before you know it, you’re on your last brush strokes in this painting.

Tip #5. Be patient. Since you’re painting on a large canvas, naturally, it will take more time to finish and to dry, so be patient. If you’re an artist who get bored easily or can’t delay gratification, then creating large-scale paintings is not for you.

Image source: www.wikipedia.org

Types of Stretcher Bars

Stretcher bars play a major role in the appearance of a canvas artwork or Giclee printing. The quality of wood and the structure of the stretcher are the key to easy stretching which produces a better print quality and longer life for a canvas. It is also important that you choose the right stretcher for your canvas depending on the type of canvas you will use, the size of your artwork and weight and texture of the weave of the canvas. The following are the types of stretcher bars and their uses.

stretchers

Medium/Standard Duty
Medium duty stretcher bars are the standard stretcher bars with raised and rounded edges which significantly reduce the friction of stretching. It provides a tighter and more even canvas face. It also reduces the stress placed on the canvas and the person doing the stretching, as pliers lever the canvas around the frame.

Light Duty
Light duty stretcher bars are great for those smaller paintings or giclee prints that will be framed or won’t benefit from a thicker bar. They have a beaded (rounded) edge that holds the canvas and flat part of the bar slightly apart. The rounded edge greatly relieves the stress on the canvas and person framing. A tighter, more uniform stretch is the result of this feature because the canvas flows around the smooth edge.

Medium/Heavy Duty- Goldilocks
Goldilocks medium or heavy duty stretcher bar is an expensive option because it is in demand for those who require a substantial side profile for their valuable art work. It adds to the intrinsic value of the art without having to spend more. This stretcher profile is frequently used for the stretching of giclee and other prints.

800px-Light_stretcher_bars_assembled_disassembled_051907

Heavy Duty-Midi
Heavy duty Midi bars offer you an exceptional quality at a very reasonable price. Like all other gallery wrap stretcher bars, their edges are created to impart a smoother stretching with less resistance. These light-weight bars are also perfect for reducing the overall weight of the frame. Straight-grained and lightweight these bars are perfect for also reducing the overall weight of the frame.

Super Heavy Duty
The super heavy duty gallery wrap stretcher bars are known for their impressive mass as well as strength. It is very useful when you have to stretch that large canvases and paintings. It is also ideal for smaller frame applications where very high tension is required. They are usually made with a brace at the back for added strength.

Image source: commons.wikimedia.org

How Stretcher Bars Are Made

www.canvaslot.com
www.canvaslot.com

A stretcher bar is a wooden frame that is used as wooden framework support (usually made from pine) on which an artist fastens a piece of canvas. It provides a steady tension to the canvas and gets the canvas artwork very flat and taut on the frame base, and thus makes it ready to be placed in a picture frame or to simply hang it as is. A stretcher can be bought ready-made as four parts that you just fit together, or you can just buy a pre-stretched canvas at canvaslot.com or you can just do it yourself. Here’s how.

Materials:
• 1×2 inches (2.5-by-5.1 cm) wood (4 pieces)
• Hand saw or power tools
• Miter block
• Staple gun
• quarter-round trim (4 pieces)
• Pencil
• Hammer
• Headless nails (not longer than the width of your quarter-round and 1×2 inch wood combined)

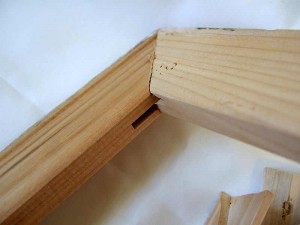
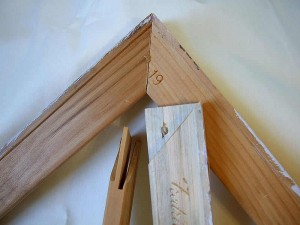
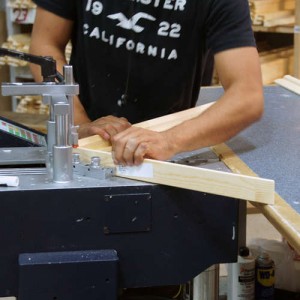
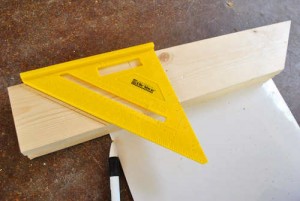
Step 1– Choose the type of wood you want to use. The sides should measure 1 by 2 inches (2.5 by 5.1 cm). Measure the wood according to the desired dimensions then cut with a forty-five degree angle at each end. You can use a miter box to make good, equal, 45 degree cuts at each end so that the wood fits together properly at the corners.

PinFrame-3-Marking-2nd-Cut

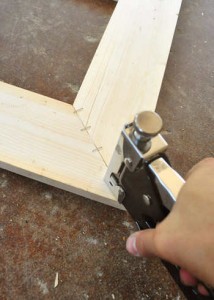
Step 2– Bring together the edges of the cut wood on a flat surface and use powered staple gun to secure the corners by placing 3 staples over the line where the corners come together. Staple the rest of the corners and do this on both front and back of the joints to make the entire frame become very strong and rigid.

PinFrames-11-Stapling

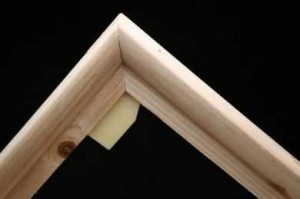
Step 3– Cut the trim pieces with whatever tool you used on the other pieces of wood. Place one flat side of the quarter-round against the stretcher bars, and the other flat side facing outward. The curved edge of the quarter-rounds should be facing inward toward the center of the frame. The purpose of the quarter-round pieces is to raise the canvas off of the stretcher bars. To secure the trims to the frame, nail them with headless nails. Do this by spacing the nails at 4-inch (10.2-cm) intervals to keep it solidly in place.

38IMG_0013

When the entire frame is finished, it’s time to start stretching the canvas. By stretching your own canvas, you can not only save money, but get something you’re willing to experiment on. You also get a canvas that’s exactly the size you’re after.

Image source: www.younghouselove.com

Tips in Abstract Painting

The techniques used to create abstract art consist of either a pattern or random system of lines, shapes, colors, or splatters of paint. The overall flow of design needs to always be kept in the back of your mind as you add more and more to your creation. Your art techniques will be much like following a method of steps.

abstract

1. Layout
Sketch the patterns that you wish to create by drawing them in the canvas with a pencil charcoal. In this way, you are able to outline the figures that you want in the exact places. The great thing about learning how to paint abstract art is that you don’t necessarily require any form of subject matter. But this step is important for you to be consistent in your concept.

2. Background
This is the first layer of color you will be applying to your painting. This layer of paint is just the base of your painting so it has to be a thin layer. This is achieved by using small amount of turpentine to the color you are using. Try to make it a point that the color of your background will enhance the composition of your painting.

3. Top color
This is where you will start painting out the framework of your images over the Bottom Color. This is the time where you bring your sketch to life. Planning your colors will make your abstract art more interesting. Discover your own abstract art technique and don’t hesitate to be creative.

4. Details
This is where you put whatever small details that you find necessary before determining your art completion. This is also the step where you can add some more expressions and character to your abstract painting. There are no confines of rules when working with the imagination to produce a beautiful piece.
In order to properly learn how to paint abstract art, you first must begin to appreciate that a lot of what you are trying to produce on the canvas is governed by the nature of your own technique, intention and your inner vision. It takes a lot of passion and imagination to create an abstract art.
I believe you can never really learn how to abstract paint because it is more on an instinct. When trying to paint an abstract art for the first time, remember that you don’t really have to get it right. If you’re not satisfied with your work then keep on going. There is no finish line or mistakes in abstract painting. As long as you convey to your audience and have mutual (not necessarily the same) appreciation of your art.

Image source: www.wallpaperabstract.com

Tips on How to Understand Abstract Art

Interpreting an abstract art doesn’t have to be so complicated. Just like interpreting more realistic paintings, there is no fixed right or wrong way to look at it or understand it. . Here are some tips that you can take into account when viewing abstract art.

Claudie-Bastide-2
Abstract art by Claudie Bastide www.claudiebastide.wordpress.com

Create a connection with the art. The artist has probably carefully considered your role as the viewer of the painting and wants it to speak to you on some level. The connections you make with a piece of abstract art may discover a whole new meaning. Artists are open to hear what different viewers uncover in dialogue with their artwork, even if it’s nowhere near the artist’s original idea. Just the thought of allowing yourself to be taken in by their painting will make them feel satisfied with their art.
Do not try to interpret abstract art by looking at the title given to the work. This will more often than not confuse you even more because you will try to look for the title in the painting instead of looking for the concepts and other more important things that the art can offer. Try not to be influenced by the title then you will see that it is so much easier to understand it, irrespective of what its name suggests.

Abstract art by Brian Potter www.brianjpotter.com

Do not let other viewers to influence your interpretation when trying to figure out a piece of abstract art. This may lead you to believe that you do not ‘understand’ abstract art and you’ll try to modify your own interpretation. When seeing a work of abstract art, you have to see what the scene means to you and what emotions it evokes in your mind. It may not be the same as anyone else’s opinion, but this will be your unique interpretation of the work.
See it as more than a single, isolated creation: there must be a context to truly appreciate a work of art. Every painting is created within a particular environment, and if you do not understand that environment, you will never be able to appreciate what the artist has to offer you. This is why, when you study the work of a particular artist, it makes sense to learn something about his life and the culture in which he lived.
Do not focus on physical aspects of the art but instead try to see the energy, the darkness and brightness, and the shower of emotions that these things reflect and you will find that you finally ‘understand’ abstract art. Let your eyes play with the colors of the painting, slipping around the geometry, following the twirls, twists and turns, dipping in and out of the surface.

Image source: www.abstractartistgallery.org

5 Ways Artists Can Protect Themselves From Online Scams

art.computer.securityThe information age makes its easier for artists to introduce, promote, and sell their paintings using the Internet. Artists can use the services of numerous online art galleries and social media networks to establish their art business. They can also set up their own art website or art blog as platforms for their online business. The Internet makes it easier for artists to do business but unfortunately, there are scammers who also take advantage of technology. As an artist, you must protect yourself and prevent becoming a victim of art scams.

Ways to protect yourself against fraud:

1. Be skeptical. If you receive an email or an offer that’s too good to be true, it probably is. Artists are vulnerable to these scams because they are hungry for fame, excited to make that first sale, and eager to make connections in the business. Signs to look for in a scam email: wrong grammar and spelling of words, urgency to buy, and the so-called buyer insists on arranging the shipment of the painting. Check out the Internet for the lists of email scams, including popular scammer names and email addresses.

2. Establish strict rules on accepting check payments and money orders. To protect yourself, never accept postdated checks, third-party checks, and checks where the amount is more than the agreed upon price for the artwork. Don’t accept overpayment wherein you have to refund the excess amount. For money orders, request the buyer to send payment from a trusted, domestic bank.

2. Make sure the payment is correct and has been cleared. Do not ship the painting unless the check or money order has been cleared in your bank. It takes three weeks or longer before a bank clears checks and if the check you’ve deposited turned to be a counterfeit, your bank may charge penalty fees on you.

3. Protect all online transactions. Use a trustworthy online payment service such as PayPal which protects both you and the buyer. If you’re buying art online, see if the web address starts with “https” or has a padlock symbol. These signs mean that the website where you are placing payment is secure and financial information such as your credit card number is encrypted when it is sent.

4. Be vigilant against computer viruses, trojans, malware,etc. Use the latest anti-virus and anti-spyware programs and keep them updated. If a virus attacks your computer, it can lead losing all your files, including the commercial photos of your paintings. Activate the firewall to prevent online criminals from accessing your computer and getting vital information on your art business.

5. Report scams. If you’ve been a victim of fraud, report it to your State Attorney General’s Office of Consumer Affairs. You can also file a complaint with the Federal Trade Commission.

Image source: www.cnn.com