How to Frame Watercolor Paintings
Framing a watercolor painting is different from framing an oil painting on canvas. Know the purpose why you‘re framing your artwork and that is to display it in the best way and to protect it with a frame, mat and glass. Here are some easy steps and tips on how you can frame your own watercolor painting.

Materials
Aside from glass, you need to protect the painting with a mat and backing (usually foam core), which should be acid free and archival, to prevent your painting from turning yellow overtime. Use a double mat because it looks better. You also need some acid-free cloth tape to attach the painting to the mat. The mat keeps the painting from touching the glass, which is very important. If you opt not to use a mat, then you need to put a spacer between the glass and the painting so they don’t touch.
Sizing
You have three options for acquiring mats and frames. The cheapest way is to buy a pre-cut mat and pre-made frame. Alternatively, you can purchase the equipment to cut your own mats, and even buy parts to assemble your own frames. Eventually you can save money by cutting your own mats, if you do enough of them, although I’ve found the mat material to be expensive unless bought in bulk. Finally, you can simply order what you need from a framer.
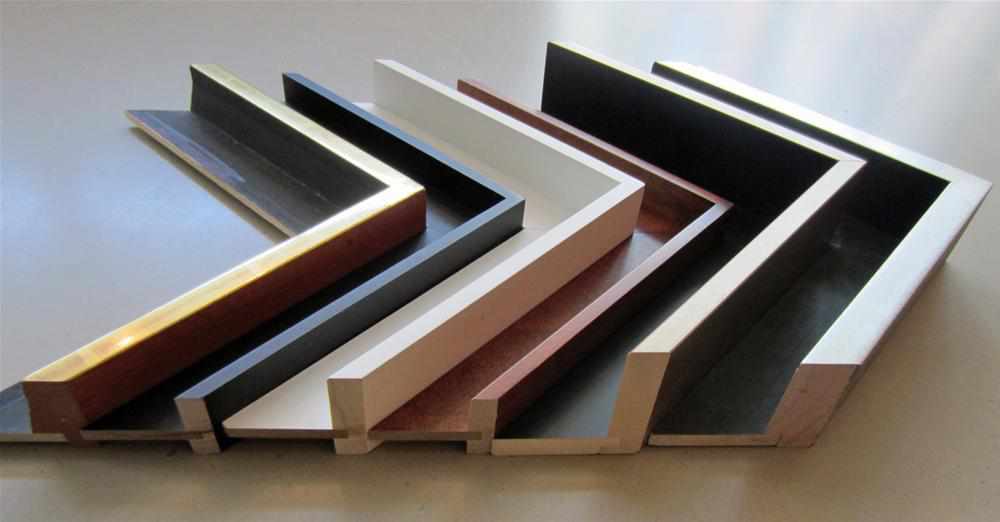
Frame
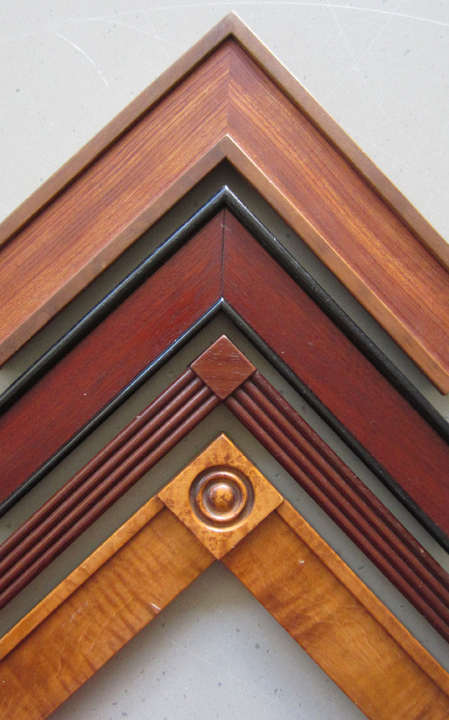
Finally, you need a frame. In general, the larger the painting, the wider the frame molding can be, but it’s all a matter of taste. Do, however, consider how the end result will look when you’re selecting molding. You don’t want to either overwhelm or underwhelm the artwork.
 Assembly
Now that you have everything you need to frame your painting, you can now start assembling. Here’s how.
1. Wipe glass and make sure not to leave finger prints before placing in the frame.
2. Prepare you pre-cut mat and you can stack them inside the frame since they are thin. You can triple or double the matting with different colors if you want.
3. Surface could be plain paper, linen, silk, even leather, rice paper, can be textured and patterned.
4. Most mats are only available with a white core (the tiny part that shows when a bevel opening is cut). But a handful of mats do come with black core, green, red and yellow.
5. A common form of decoration on non cloth mats is the “French Line” or “French Panel”. These are lines drawn in ink or paint forming a rectangle around the opening. Could have several lines.
6. It is best to buy Acid Free mats. An acidic mat will fade and leak into the art work, causing “mat burn”, light brown marks.
7. So you have the matt, now attach picture with non acid tape to the mat. Place on glass.
8. Put the foam board, hold in place with framing points (look like small metal arrows).
9. Turn over, look at art work before inserting point in frame and across top of the foam board.
10. Lay the paper back attached to back of frame covering top to bottom, side to side (called dust cover).
11. Drive in fastners into back of frame, about 1/3rd down from top. String wire between fastners.
Image source: www.mimenta.com