Tagged: acrylic painting

Tips in Painting on Large Canvases

Spolarium_Luna
The Spoliarium by Juan Luna, 1884. It measures 4.22 meters x 7.675 meters.

Many artists dream of painting on a bigger canvas. If you have an idea or inspiration that cannot be captured on standard size canvases, going big is your way to go. However, if you’ve never painted on a large canvas, you can be intimidated and overwhelmed with the thought of creating big-scale art. Here are some tips that can help you overcome your fears on painting big.

Tip #1. Gradually paint on bigger canvases. Help your mind, eyes, and hands to adjust painting on a large canvas. Every couple of weeks or so, try to paint on a canvas which is bigger than the previous one you used. This practice will help you get comfortable and get used to painting big. With a small canvas, you’re working on a limited space so the details are smaller, lines are finer, and you finish quicker than painting on large-scale canvases so, you may have to practice your brush strokes little by little until you reach your desired canvas size. Learn from your mistakes and correct them along the way. Don’t be in a rush to work on a large canvas.

Tip #2. Know the scale of the painting. Are you using a big canvas to fill it with small details of a complex subject (e.g. historical event) or are you painting a big-scale of a small subject (e.g. portrait, nature). Find the balance among the subject, the size of the canvas, and your painting style. Remember, just because the painting is bigger, doesn’t mean it’s better than ordinary size painting. Some subjects are perfect for larger canvases while some are best with small canvases.

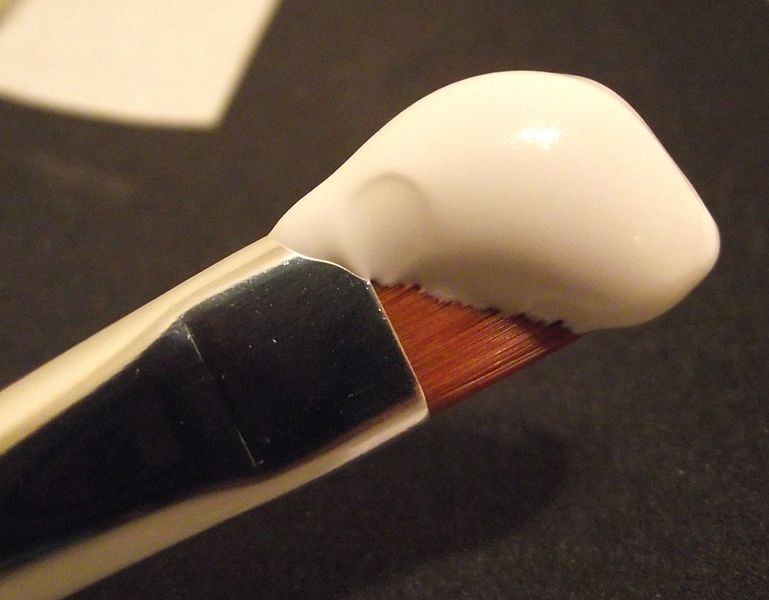
Tip #3. Use bigger brushes. Bigger brushes will help you finish the painting faster. You can cover larger areas of the canvas and you can loosen up a bit when painting, like a child painting freely on the wall. Stand back from the canvas and see if you’re on the right track.  You can still use small brushes, though, if you’re more comfortable with them and if the style of your painting requires them.

Tip #4. Divide the canvas into sections. Working on a big painting can be overwhelming. Using your sketch as guide, try to divide the canvas into sections and do one section at a time until you finish the whole painting. You can also try breaking down the elements of the painting and before you know it, you’re on your last brush strokes in this painting.

Tip #5. Be patient. Since you’re painting on a large canvas, naturally, it will take more time to finish and to dry, so be patient. If you’re an artist who get bored easily or can’t delay gratification, then creating large-scale paintings is not for you.

Image source: www.wikipedia.org

Buy Fine Art From Amazon…Soon

amazon

Wall Street Journal reports that Amazon is discussing plans with about 100 art galleries in the US of selling fine art online. The e-tail giant plans to create another part in its site where it will offer unique paintings, prints, and other fine art pieces. Amazon has already organized cocktail receptions in Seattle, and other big art cities including New York and San Francisco, inviting galleries to join the plan.

According to WSJ, Amazon will charge the art galleries a monthly membership fee of $100 and will get a commission of 5-20%, depending on the sold artwork. Higher-prices pieces would be subject to lower commission rates. The membership fee would be waived for art houses which would partner with Amazon in selling high-end art until 2015. Amazon will be using a retail model, which means each artwork has a fixed price, unlike art auction houses where the highest bidder gets the art.

Online selling of fine art is a double-edged sword. Amazon’s plan is a great way for art galleries to reach more people. Art lovers outside the city such as New York would be able to buy great art without traveling to the city. At the comfort of their homes or offices, people can easily buy art, even without visiting the actual art gallery. However, a drawback of this plan is that people may be hesitant to buying expensive paintings without seeing the actual painting. Most likely, art buyers won’t pay six- or even seven-figures for something that they only see online. Unlike buying a book or a gadget online, serious art collectors would naturally want to see the artworks personally.

High-end online auctioneers such as Sotheby’s and Christie’s said there is a growing market for expensive art over the Internet. Sotheby’s BidNow program was able to sell a 16th century portrait of Giovanni Gaddi for $2 million in 2012. Christie’s have been accepting online bids since 2007. It revealed that 27% of its auction sales ($6.2 billion) last year came from online bidding and regular auctions. Christie’s was able to sell Edward Hopper’s oil on canvas painting entitled “October on the Cape” to an online bidder for $9.6 million.

As of now we’re not sure if Amazon’s plan to sell high-end art will come to fruition. In 1999, Amazon forged a partnership with Sotheby’s to sell fine art but it lasted for 16 months only because the jointly operated auction site, Sothebys.Amazon.com, failed to gain traction. Also, there are many online art galleries offering a wide range of art from numerous artists that already have established markets and loyal clientele.

Image source: www.gizmodo.com

Types of Painting Easels: An Introduction

311px-Tripod_easel
A-frame easel

Dictionary.com defines easel as “a stand or frame for supporting or displaying at an angle an artist’s canvas.” Easels are usually made of wood, steel, or aluminum and are available in different designs. Here are the different types of easels in the market:

1. A-frame or Lyre easel. The A-frame easel has a tripod design, meaning, two legs in front and one in the back. It provides a strong base  for your painting and it’s small size makes it easy to move and store in your studio. The legs are collapsible so you can just fold the legs and keep it in your storage when you’re done painting. If you have a small space, an A-frame easel is perfect since it will not crowd your studio. A-frame easels can hold small size canvases up to 75″ canvases.

2. H-frame easel. As the name suggests, an H-frame easel looks like the letter “H.” It has parallel vertical posts and a horizontal crossbar support. It gives sturdier support compared to A-frame easel but it’s quite bulky. An H-frame easel can hold bigger canvases, up to 84″-96″.

3. Single mast easel. The single mast easel is the simplest type of easel. It doesn’t offer the same support as the A-frame and H-frame easels but because of its affordability, many art students and beginners opt to use it. It occupies less space (great for small apartments and school studios), is collapsible, and easy to store.

4. Giant easel. The giant easel is made for artists doing large-scale paintings. It can handle canvases taller than 8 ft so naturally, this easel is stronger and sturdier. Due to its weight, transporting a giant easel is not easy. If you are consistently working on large-scale paintings, use a giant easel but make sure that you have a dedicated studio where you can use and store it.

5. Convertible easel. The convertible easel, also called hybrid easel, is the most versatile among all other easels. You can position your canvas horizontally or vertically, depending on the surface needed by the medium you’re using. This easel can accommodate the needs of painters using oil, acrylics, watercolor, and pastels. If you’re an artist who uses several media, the convertible easel is best for you.

6. Table top easel. The table top easel can be placed on a table and allows the artist to sit while painting. It is great for those who work on small-scale paintings and those who have limited space in their room or studio. It is portable and stores easily.

7. Plein air easel. The plein air easel is the easel that you can use outdoors. It has tripod legs and can have drawers and shelf to hold your painting supplies and materials. It can hold canvases up to 45″-78″ high.

8. Bench easel. The bench easel combines an easel and a bench. The design allows you to sit while painting. It is collapsible so you can bring it anywhere. It is great for plein air artists, art teachers, or for those giving demonstrations.

9. Display easel. The display easel is not for painting, just for displaying paintings only. It is made of lighter material so it cannot hold heavy artworks. Use the display easel when you are having an art show or any event where you need to showcase your work.

10. Children’s easel. The children’s easel is created for kids. It is adjustable and most designs have two sides, allowing a couple of children to work on their paintings.  It offers built-in storage where children can keep their art supplies.

Image source: www.wikipedia.org

5 Ways Artists Can Protect Themselves From Online Scams

art.computer.securityThe information age makes its easier for artists to introduce, promote, and sell their paintings using the Internet. Artists can use the services of numerous online art galleries and social media networks to establish their art business. They can also set up their own art website or art blog as platforms for their online business. The Internet makes it easier for artists to do business but unfortunately, there are scammers who also take advantage of technology. As an artist, you must protect yourself and prevent becoming a victim of art scams.

Ways to protect yourself against fraud:

1. Be skeptical. If you receive an email or an offer that’s too good to be true, it probably is. Artists are vulnerable to these scams because they are hungry for fame, excited to make that first sale, and eager to make connections in the business. Signs to look for in a scam email: wrong grammar and spelling of words, urgency to buy, and the so-called buyer insists on arranging the shipment of the painting. Check out the Internet for the lists of email scams, including popular scammer names and email addresses.

2. Establish strict rules on accepting check payments and money orders. To protect yourself, never accept postdated checks, third-party checks, and checks where the amount is more than the agreed upon price for the artwork. Don’t accept overpayment wherein you have to refund the excess amount. For money orders, request the buyer to send payment from a trusted, domestic bank.

2. Make sure the payment is correct and has been cleared. Do not ship the painting unless the check or money order has been cleared in your bank. It takes three weeks or longer before a bank clears checks and if the check you’ve deposited turned to be a counterfeit, your bank may charge penalty fees on you.

3. Protect all online transactions. Use a trustworthy online payment service such as PayPal which protects both you and the buyer. If you’re buying art online, see if the web address starts with “https” or has a padlock symbol. These signs mean that the website where you are placing payment is secure and financial information such as your credit card number is encrypted when it is sent.

4. Be vigilant against computer viruses, trojans, malware,etc. Use the latest anti-virus and anti-spyware programs and keep them updated. If a virus attacks your computer, it can lead losing all your files, including the commercial photos of your paintings. Activate the firewall to prevent online criminals from accessing your computer and getting vital information on your art business.

5. Report scams. If you’ve been a victim of fraud, report it to your State Attorney General’s Office of Consumer Affairs. You can also file a complaint with the Federal Trade Commission.

Image source: www.cnn.com

Guidelines for Artists in Packaging Paintings for Shipment

shipping-blank-canvases

Transporting artworks is part of an artist’s life. If you have an out-of-town exhibition or seminar, running an art business, or selling and collecting paintings, shipping paintings is very important. Shipping paintings can be a bit risky. Paintings are delicate and you must take utmost care in packaging, and handling them.

Here are some guidelines to help you in packaging paintings. Note that, despite best efforts, there are still some uncontrollable factors such as bad weather, untrained art handlers, rough roads, etc. that could damage your paintings while in transit. These guidelines will help you send your paintings safely and lessen the damage (if any).


Before shipping
1. Assess your shipping needs. Know the size, medium, and condition of the painting. Fragile, old, or antiquated paintings will be more damaged when shipped so it’s better to transport paintings which are less fragile. But, if you really need to ship a painting that is fragile, you have to take a different approach in packing and shipping it.

2. Consider the distance the painting has to travel. The farther the painting has to move, the more vulnerable to damage it gets. When the painting has to be shipped in great distances, remember that many handlers will be in between Point A to B.

3. Decide which transportation is best to use in moving your painting. Can you move your painting by hand, by car, by truck, or by plane?

4. If you will need a shipping company, search for a trustworthy company and determine the policies, restrictions, and cost of their service.

Packaging
Packaging your painting by yourself can save you money, if done correctly and with the right supplies. Here are the steps:

1. Make sure you have these packing supplies on hand, especially if you’re running an art business.

  • Boxes
  • Palette tape & wrap
  • Cardboard pads
  • Bubble wrap
  • Packing tape
  • “Fragile” stickers

2. Measure the dimensions of the painting. Give a 2″ allowance all around the piece which will serve as a buffer against the outside world.

3. Starting from the back of the canvas, wrap the palette wrap tightly around the painting and cover the entire surface.

4. Cut small slits on the plastic at the back of the painting to let the piece “breathe.”

5. Put the cardboard padding on the table. Place the painting on top of the cardboard padding and measure the width and depth of the painting. Double these measurements and add few more inches if you want and mark these on the cardboard.

6. Cut the cardboard using the measurements. Create a second box using the cardboard padding. Put the painting inside and secure the box with the packing tape.

7. Tightly wrap the bubble wrap around the second box. Tip: Put another layer of bubble wrap on the edges of the box as extra cushion since the edges of the painting or the frame are more prone to damage when shipping.

8. Put the bubble-wrapped second box into the outer box. Fill any spaces with additional bubble wrap. If there are a lot of extra spaces, you can opt to cut the outer box to fit the second box.

How to Use Gesso on a Canvas

acrylic_gesso

Gesso? What is it?

Most beginners in painting may be unfamiliar with the word “gesso.” It’s a highfaluting term that could leave a novice dumbfounded. But, don’t fret. In this post, I’ll try to shed light on this and hopefully, we can understand what gesso is all about.

Encyclopaedia Britannica defines gesso (pronounced ‘jesso’) as:

“a fluid white coating, composed of plaster of paris, chalk, gypsum, or other whiting mixed with glue, applied to smooth surfaces such as wood panels, plaster, stone, or canvas to provide the ground for tempera and oil painting or for gilding and painting carved furniture and picture frames.”

Basically, gesso is a substance used to prepare or prime a canvas before you can use it in painting. It was traditionally used by oil painters so the oil paints would adhere to the canvas. Gesso is used to protect the canvas fibers, smoothen the surface, and give flexibility to the canvas.

Is there a difference between an oil gesso and an acrylic gesso? Yes, their ingredients. Traditional oil gesso, also called glue gesso, contains an animal glue binder (usually rabbit-skin glue), chalk, and white pigment. Acrylic gesso is made of an acrylic polymer medium (binder), Calcium carbonate (chalk), a pigment (Titanium white), and chemicals for flexibility and longer life.

Acrylic gesso doesn’t contain glue since acrylic paints is not corrosive, unlike oils. The glue in the glue gesso is absorbed by the fibers of the canvas which protects it from the corrosive nature of oil paints. Many artists use acrylic gesso because of its versatility, quick drying time, convenience, flexibility, and ease of use. Some artists claim that it can be used as ground when painting in oil but some argue that the flexibility of the acrylic gesso will cause the oil paint to crack over time.

An acrylic painter could choose not to use acrylic gesso if he wants the staining effect of acrylic paints on canvas. For beginners, it’s better to prime the canvas first, or use a pre-primed canvas since you are still practicing your painting skills. CanvasLot offers pre-primed canvas in various sizes so you won’t go into the trouble of priming your canvas.

If you are a beginner in oil painting, you can use acrylic gesso but just make sure that the canvas has been properly sized. If you are creating a portrait, or planning to create a masterpiece or something like an heirloom to your family, it’s better to use the oil gesso since the oil paint will stick better to it than to an acrylic.

You can buy acrylic gesso in most art supplies shops and it is available in artist quality and student quality. As with other art supplies, the artist quality acrylic gesso is more expensive and has higher quality than the student gesso. For priming a canvas, use the artist quality gesso.

Image source: www.wikipedia.org

Tips for Caring and Handling Acrylic Paintings

Acrylic_care

Acrylic paints were introduced in the 1950s, much later than oils, but museums, galleries, and art collectors have included many acrylic paintings in their collections. Artists have experimented and used acrylics on canvas for its versatility of use and quick drying time. The properties of acrylic paints differ from oils so the maintenance and caring for acrylic paintings is different from oil paintings. Since acrylic paint is relatively new compared to oil paints which have been used in art for centuries, people are just starting to know its aging characteristics. For now, the best way to preserve and lengthen the life of acrylic paintings is by preventive care.

Here are the tips for caring and handling acrylic paintings:

Cleaning
Currently, there is no concrete guideline how to clean an acrylic painting. Below are just suggestions that you can do at the moment.

1. Use a clean towel or a feather duster and lightly remove the dirt on the surface of the painting. Acrylic paintings gather dust more easily than any other medium so you may have to dust them frequently.

2. If you want to keep off the dust, put the painting in a protective frame. Acrylic paintings have electrostatic charges on the surface which attracts dust and a protective frame will prevent dust from accumulating.

3. Don’t use water, soap, or household cleaners when cleaning acrylic paintings. Most cleaning agents have ammonia which can damage your painting. When you use cleaning sprays in your house, make sure that your acrylic painting is not nearby when you are cleaning to avoid excess droplets of the spray go to the paintings.

Maintenance

1. Keep acrylic paintings away from direct or extreme heat, cold, and humidity. Acrylic paint becomes soft around 60° so display your paintings far from ovens, stoves, heating lamps, or any other source of heat inside the room.

2. Don’t touch the surface of an acrylic painting. Your fingernail may accidentally leave a dent or put extra pressure on the painting which will lessen the value of the piece.

3. Mold growth is a common issue in acrylic paintings. There is no solution for it yet that would retain the original paint of the piece. The best way to lessen mold on the surface is to hang the painting in a room where there is less humidity.

Transporting

1. Put the acrylic painting in an effective packing case that would protect it from damage. According to this website, a packing case should be able to do the following:

  • Support the painting, insulation and cushioning foams
  • Protect the contents from impact and puncture without serious distortion
  • Maintain a sealed environment
  • Protect against intrusion of moisture
  • Provide handles for lifting and moving
  • Survive a multi-venue tour without compromise of any of the above functions

2. Include instructions for unpacking and repacking outside the container. The recipient may not know the proper way of unpacking the painting so proper instructions should be provided by the sender. These instructions are important especially if there is a dispute about any damage caused by shipping, unpacking, or repacking of the painting.

3. If you have to transport the painting by rolling it, here are tips:

  • Allow enough time for the painting to be completely cure.
  • Put a polyethylene plastic onto the surface of the painting before rolling.
  • Roll and unroll the painting at room temperature. A heated room will melt the paint while a cold room will cause cracking.
  • Roll the painting loosely and evenly to prevent adhesion or ferrotyping.
  • Once packed, secure the painting with a tape.

Image source: www.goldenpaints.com

How to Repair a Damaged Canvas

You’ve finally finished your masterpiece. After hours and days laboring on your painting, carefully putting your inspiration on canvas, you’re excited to display it. Unfortunately, you or someone else accidentally ripped a small area on your painting. What do you do?

Don’t panic. There are two ways to repair a torn, ripped, punctured, or damaged canvas: patching or lining. Before fixing your canvas, you have to consider some factors that would affect the end result of your repair. If the damage is small, patching would be a good remedy. Patching is a quick and easy solution to tiny punctures, L-shaped tears, and small tears. For damages affecting a large area or if the small tears are located in several areas, lining is the best way to fix the canvas. For old oil paintings, professional art restorers prefer to do lining since most aged canvas are brittle, fragile, and more susceptible to damage when not reinforced.

tear-canvas-repair

Patching
Here are the steps for patching a canvas:

1. Smooth out the area where the tear is located. Clean up any fibers that may have unraveled.

2. Cut a piece of canvas with at least an inch wider than the tear. If you have a lighter weight canvas than the one you’re repairing is best to use.

3. Glue the patch at the back of the tear. Use acrylic-gesso or an acid-free glue in patching. Apply a thin layer of glue to the patch. If you use too much glue, it will only squeeze out of the patch and get on the front of the canvas which will leave an unnecessary stain.

4. While the glue is still wet, check the tear at the front of the canvas. Use a pair of tweezers to put back loose threads in place. Carefully arrange the threads to fill the damage.

5. Inpaint the patched area, if needed. If it’s your own work, it would be easier to repaint the repaired area.

Tips:

  • Work with patience and care.
  • Hire a professional art conservator or restorer for fixing valuable and antique paintings. They can do a more refined repair of an old painting.
  • Patching done in a busy area of the painting is less noticeable than a patch in a solid area.
  • Just because the patch is located behind the canvas, doesn’t mean you will do a sloppy repair. Make the patch neat and professional-looking so if someone sees the repair, they won’t be dismayed with the whole painting.

Image source: http://painting.about.com

The Beauty and Popularity of Photorealism

American author and art dealer Louis K. Meisel coined the term “photorealism” in 1969. It refers to a genre of painting based on using photographs as basis for a realistic and photographic art work. This movement started in the late 1960s and early 1970s. During that time, artists captured images of their subjects to gather visual information and used these photos in their paintings.

To give a definite definition for an artist to be considered as a photorealist, Meisel released these 5 points:

  1. The Photo-Realist uses the camera and photograph to gather information.
  2. The Photo-Realist uses a mechanical or semimechanical means to transfer the information to the canvas.
  3. The Photo-Realist must have the technical ability to make the finished work appear photographic.
  4. The artist must have exhibited work as a Photo-Realist by 1972 to be considered one of the central Photo-Realists.
  5. The artist must have devoted at least five years to the development and exhibition of Photo-Realist work.
crayola_flack
Crayola by Audrey Flack, 1972-73.

The cool thing about photorealism is that you can mistaken a photorealistic painting as the actual photo. You’ll be surprised how a painting can look fantastically as the real thing. Many artists who are called photorealists have experimented and became popular in this painting style such as Charles Bell, Audrey Flack, Tom Blackwell, and Raplpf Goings. They use ordinary, mundane objects as their subjects such as food, flowers, beaches, diners, etc.

Before creating a photorealistic painting, artists create several studies of the subject to learn its composition, colors, shadows, form, and perspective, much like a mock-ups. From these studies, they can try to tell which element or area could become a problem when painted in large-scale and they try to find a solution. These artists gave attention to the minutest details of the subject and they try to portray subjects as accurately as possible, a total opposite of the Abstract Expressionist movement.

Between_Two_Places-Zener
Between Two Places by Eric Zener

You may ask, why create a photorealistic painting that take days or even months to finish when you can just take the subject’s picture? The answer: technical virtuosity and enigma. It’s fascinating to look at these paintings because you’ll think they’re “real” but they’re not, because they’re paintings.

Many contemporary photorealists have created art works using water (swimming pools, bathrooms, water splashes), reflections (mirrors, glasses, bottles), food from freshly cooked to packaged ones as subjects. The colors are vibrant, vivid, and intense, it looks like you can almost touch the subject of the painting. Amazing, right?

Image sources:
http://www.audreyflack.com
http://www.escapeintolife.com

Acrylic Artists Who Made Their Mark in History

Campbells_Soup_Cans_Warhol
Campbell’s Soup Cans, 1962

Many artists use acrylics in painting due to its fast-drying qualities and versatility. Unlike oil paints which take decades to fully dry, an acrylic painting can dry in just hours. You can also use different painting styles when using acrylics and you can use it on canvas, paper, wood, glass, or even stone.

Here are the famous artists who used acrylics in their art works:

1. Andy Warhol (August 6, 1928 – February 22, 1987). Andy Warhol was a celebrated American artist and was considered as one of the leading figures in Pop Art. He was the one who started the use of everyday items such as soup cans, soft drink bottles, and dollar bills as subjects in his paintings which were then displayed in museums. Aside from using mundane objects, he was fascinated in the entertainment industry and used famous celebrities and even political figures as subjects. He created portraits of Marilyn Monroe, Elvis Presley, and Jackie Kennedy.

2. Kenneth Noland (April 10, 1924 – January 5, 2010). Kenneth Noland was an American abstract painter. He was known for his geometrical themes called Chevrons and Stripes and circular motifs which are called Target paintings. Noland was known as one of the leading figures in the Color Field painting style in the US. In the 1950s, he was able to meet influential people in the art scene such as abstract expressionists Helen Frankenthaler and Morris Louis. They greatly affected the artistic direction of his career. He started using Frankenthaler’s technique in stain painting wherein he used a thinned acrylic paint on unprimed canvas. These three painters led the formation of the Color Field painting style.

3. Robert Motherwell (January 24, 1915 – July 16, 1991). Robert Motherwell was an American abstract painter. In the 1960s, he used acrylics in painting large-scale canvases. Primarily using oils, he switched to acrylics because of its quick drying time. The Elegy of the Spanish Republic is considered as one of his most important works. It is a series of abstract paintings using black and white paint in bold movements and strokes.

4. David Hockney (born July 9, 1937). David Hockney is an English painter and draftsmen, and a founding member of the British Pop Art movement in the 1960s. He is one of the most famous British  artists. His visit in California inspired him to paint swimming pools and the urban landscape using acrylics. During that time, he developed his own style of painting called naturalistic-realistic painting. One of his famous works includes The California Collector (1964) which depicts a swimming pool in LA.

5. Roy Lichtenstein (October 27, 1923 – September 29, 1997). Roy Lichtenstein was an American pop artist who used comic strips and advertisements as inspirations in his art works. He was famous for creating bright and graphic images which parodied pop culture. In one of his most significant works, Drowning Girl, he used both oil and acrylic (Magna) paints and the piece was considered as a “masterpiece of melodrama.”

Image source: http://www.moma.org